Sketch to Render AI — free online rendering
Upload a hand sketch, CAD drawing or SketchUp viewport and get a photoreal render with the same lines and camera. 3 free renders, no credit card.
Studio
Sketch to Render
Turn hand sketches or CAD into photorealistic renders.
Image
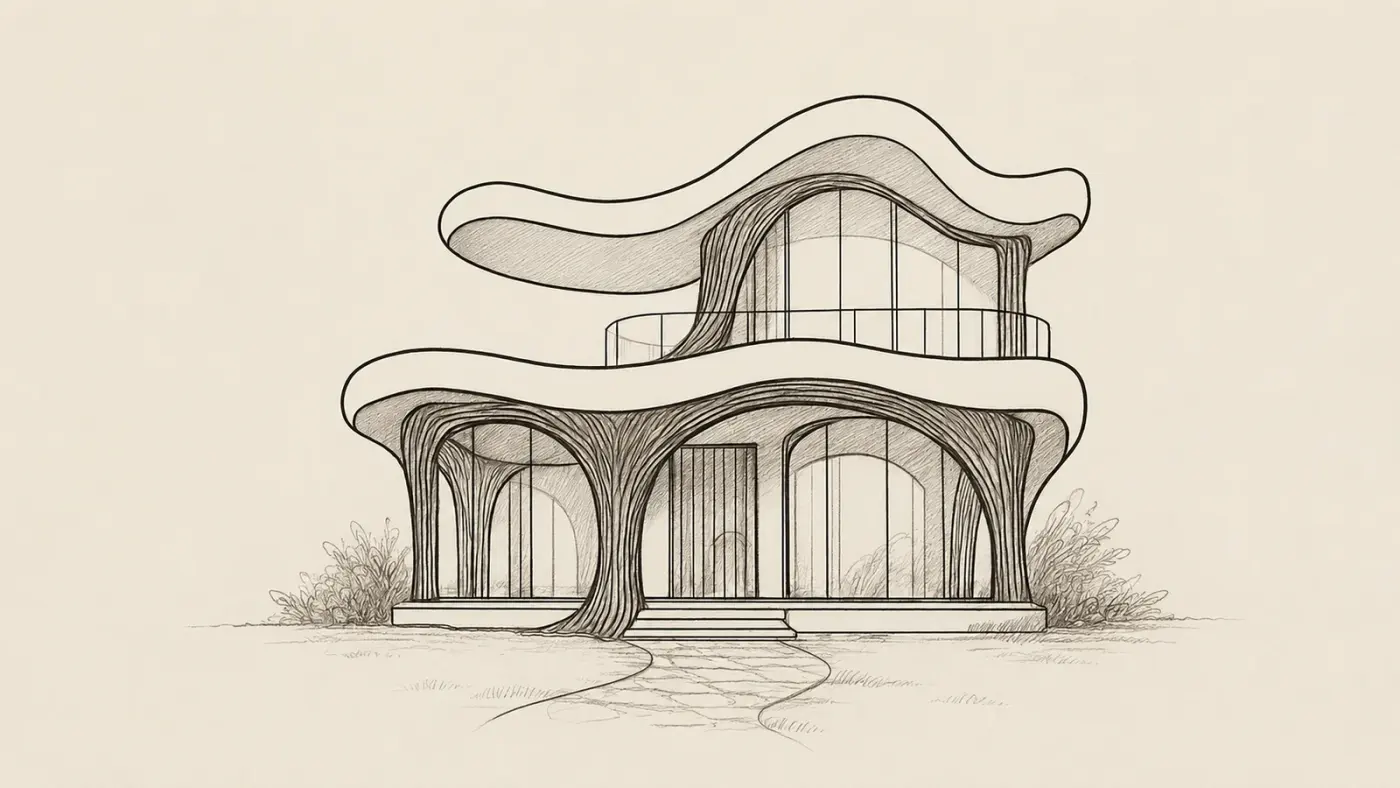
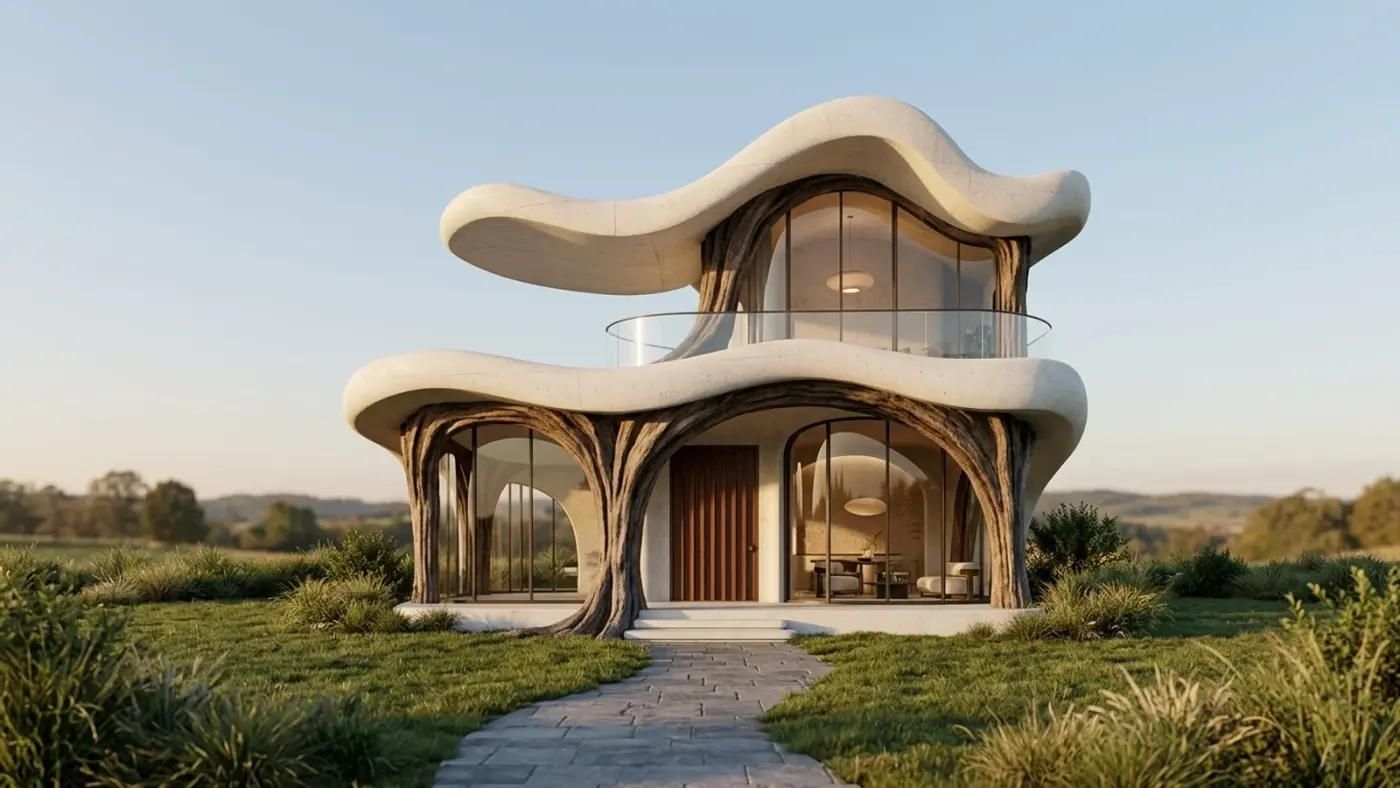
Results appear here
Upload an image and adjust settings on the left. Render variations will appear here.
Crisp, clearly drawn sketches yield the best results.
Engine
Automatic
The best engine is selected for you.
Quick style
Render style
Geometry
Camera
Output count
Room type
Room style
Custom prompt
Sketch to render, with your geometry intact
Sketch → Render takes a hand drawing, a CAD line export or a flat 3D viewport capture and turns it into a photorealistic render. The lines you drew become real walls, real glass and real materials — while the perspective, proportions and composition stay exactly as you drew them.
This is the tool most architects reach for first. A concept sketch that would have taken a day to model and render becomes a presentable visual in under a minute, which means you can walk into a client meeting with four options instead of one.
How it works
- 1
Upload your sketch
Pen on paper, iPad sketch, AutoCAD or Rhino line export, SketchUp viewport — all supported. Photograph the paper if you need to.
- 2
Describe the material world
Say what it is made of: "exposed concrete, oak floors, floor-to-ceiling glass, overcast light". The clearer the prompt, the closer the result.
- 3
Render and refine
Photoreal results in seconds. Iterate on the prompt, or send the winner through Enhance for a 4K print-ready file.
Who it's for
- —Concept sketches turned into client-ready visuals same day
- —Competition entries with fast option-testing
- —Design studio reviews where five schemes need rendering, not one
- —Students who need portfolio images without weeks of 3D work
- —AutoCAD and Rhino line exports rendered without setting up a V-Ray scene
- —Interior designers rendering a hand-drawn perspective before a client meeting
- —Developers testing a scheme visually before paying for a full 3D model
- —Site meetings where a sketch on a pad has to become an image the same afternoon
What sketch to render AI does with your line work
Your lines are the anchor. The drawing sets the geometry, the perspective and the composition, and the AI builds materials, light, depth and atmosphere on top of it rather than inventing a building of its own. That is the entire difference between a render of your sketch and a nice picture that merely resembles it.
Confident, closed lines read best. Wherever an edge is ambiguous the model has to guess, and guesses surface as soft or invented geometry. If a sketch is faint, photograph it in good light or push the contrast before uploading — you are handing the model a cleaner set of instructions, not cheating.
Everything you did not draw is open to interpretation, and that is usually the point. Sky, ground, planting, people, reflections and the world beyond the frame get filled in to match the mood you describe. If a specific element matters, draw it or name it. Once a render lands and one detail is wrong, inpainting fixes that element without touching the rest of the image.
Hand sketch to render: pen on paper to photorealistic
A photograph of a pencil drawing is a completely legitimate input — no scanner required. Shoot it flat, in even light, filling the frame, and keep the shadow of your own phone off the page. Marker, ink, pastel, iPad sketch and trace overlay all behave the same way.
This is where a hand sketch to render workflow earns its keep. The concept you drew during a meeting can be a presentable visual before the client has driven home, and four schemes get rendered in the time it used to take to model one — which quietly changes what you can afford to show.
Interiors and exteriors both work from sketch. If the drawing is an interior perspective you can take the finished render onward into interior AI to test a different furniture scheme, and a street elevation can go into exterior AI when the facade material becomes the question rather than the form.
CAD to render: DWG, Rhino and Revit line exports
CAD line work is among the strongest inputs available, because the geometry is exact. What the tool reads is an image rather than a CAD file, so the step is to export or screenshot instead of uploading the native file — a PNG or PDF export from AutoCAD, a Rhino viewport capture, a Revit or ArchiCAD line view are all fine. There is no DWG, RVT or 3DM parser here, and saying otherwise would only waste your upload.
Export clean. Dimensions, tags, grid lines, hatching and title blocks are line work as far as the model is concerned, and heavy annotation ends up rendered into the image as texture on the building. A drawing stripped back to geometry renders noticeably better than a fully documented sheet.
If you are working from a 3D model rather than a drawing, the free SketchUp and 3ds Max plugins push the active viewport through without an export step, and Revit users can screenshot a shaded or hidden-line view. An aerial site layout with roads and blocks belongs in masterplan rendering instead.
Line drawing to photorealistic: writing the material prompt
The drawing supplies the form; the prompt supplies the world. Name the materials, the light and the season in plain words — "exposed board-marked concrete, oak floors, floor-to-ceiling glass, overcast winter light" — and the same drawing becomes a different building each time you change the sentence.
Be specific about the things that carry an image: the dominant material, the glazing, the ground surface and the time of day. Vague prompts produce vague renders. There is a sketch to render prompt library of tested wordings, and a lighting and mood set for when the materials are agreed and only the atmosphere is still moving.
Iterate on the sentence, not the drawing. Because the geometry stays locked to your lines, changing one clause changes one thing about the image, which is what makes the options genuinely comparable side by side. When one wins, push it through 4K upscaling for print, or turn it into a short walkthrough clip for the presentation.
Sketch to render AI free: credits, licence and limits
Sketch to render is free to start, in the browser, with no card. Every account gets a one-time 100-credit trial; it does not renew. A sketch render costs 15 credits on Fast and 45 on Ultra; on the free tier every render is a flat 30 credits on the Fast engine — so the free trial is three renders in total. Paid plans from $29/month bill Fast at its real 15 credits and unlock Ultra, which stretches the same credits a long way further; the numbers are all on the pricing page.
Free output carries no commercial licence, and any purchase adds one. Said plainly: three renders is enough to put your own sketch through and judge whether the geometry holds, and nowhere near enough to render a competition set. That is what the free tier is honestly for.
Sketch to render AI vs manual 3D modelling vs hand rendering
| Approach | Input needed | Time to output | Best for |
|---|---|---|---|
| Sketch to render AI (this tool) | A hand sketch, CAD line export or 3D viewport capture | Seconds, in the browser | Turning a concept sketch or CAD/SketchUp export into a photorealistic render fast, without building a 3D model |
| Manual 3D modelling + render engine (V-Ray, Lumion, Enscape) | A full 3D model, textures, lighting and camera setup | Hours to days per option | Fully art-directed, high-control renders when the schedule allows several iterations |
| Freehand digital painting (Photoshop, Procreate) | A sketch plus manual painting skill | Hours per image, skill-dependent | A hand-painted illustrative look where photorealism is not the goal |
Who should pick which
- Architects rendering a hand sketch or CAD line export: The direct path: upload a pencil sketch, iPad drawing, or a PNG/PDF export from AutoCAD, Rhino, Revit or ArchiCAD, describe the materials, and get a photoreal option in seconds instead of a modelled scene.
- SketchUp and 3ds Max users: Use the free SketchUp or 3ds Max plugin to push the active viewport through directly — no export step, no screenshot needed.
- Students and early-concept testing: The free trial is a one-time 100 credits, which covers three sketch renders — enough to judge whether the geometry holds before committing to a paid plan for a full option set.
- Who should look elsewhere: If you need to upload a native DWG, RVT or 3DM file, or want a new perspective built out of a flat elevation or plan, this tool will not do that — it renders the geometry you give it, in the view you give it. And if you already have a finished render, Enhance rather than this tool is the right next step for a sharper, larger file.
Frequently asked
What is sketch rendering, and how is it different from generating a new image?+
Sketch rendering means turning an existing drawing into a finished visual — the drawing stays in charge. A general AI image generator invents a building from a text description; sketch rendering keeps the lines you already drew: same proportions, same openings, same camera angle. What gets added is material, light and depth. That is why the result still matches the project you designed, not a similar-looking building.
Does it follow my sketch exactly?+
Yes — that is the core of it. The line work anchors the geometry and perspective. Archome adds materials, lighting and realism on top of your drawing rather than inventing a new building.
Will a rough pencil sketch work?+
Yes. Clear, confident lines give the strongest results, but even loose sketches work well. If the sketch is very light, photograph it in good light or increase the contrast first.
Can I use CAD or Rhino exports?+
Yes. Line exports from AutoCAD, Rhino, Revit and ArchiCAD all work, as do plain SketchUp viewport screenshots. There are also free SketchUp and 3ds Max plugins to render directly from the viewport.
How much does one render cost?+
Fifteen credits on Fast and 45 on Ultra. On the free tier every render is a flat 30 credits, so the one-time 100-credit trial covers three sketch renders. Paid plans from $29/month unlock Ultra and add a full commercial licence.
Is sketch to render AI free to use?+
Yes — sketch to render is free to start, online, with no credit card required. Every account gets a one-time trial of 100 credits to start, which covers three sketch renders at 30 credits each. Paid plans bill Fast renders at 15 credits, unlock Ultra and add a full commercial licence.
Can I upload a DWG, RVT or 3DM file?+
No — the tool works on images, not CAD files. Export a PNG or PDF from AutoCAD, or take a viewport screenshot in Rhino, Revit or ArchiCAD, and upload that instead. It is one extra step, and it also lets you control exactly what the render sees: switch off dimensions, tags and hatching before exporting and the result improves noticeably.
How do I turn a line drawing into a photorealistic image?+
Upload the drawing and describe the material world in one sentence: what it is built from, what the light is doing, what season it is. The lines fix the geometry and perspective; the prompt fixes the materials, lighting and atmosphere. Most of the quality gap between two renders of the same sketch comes from the prompt rather than the drawing.
Does it work on interior sketches as well as exteriors?+
Yes. Interior perspectives, exterior street views, sections and axonometric drawings all render. Interiors tend to respond especially well, because the enclosed geometry gives the model plenty to anchor to.
Can I render an elevation or a plan rather than a perspective?+
Yes, but expect an orthographic result: an elevation comes back as a rendered elevation, with materials, shadow and reveal but no new vanishing point. The tool will not build a perspective view out of a flat drawing — it renders the drawing you gave it. For plans specifically, the floor plan tool is built to produce a 3D view.
Why does my render include the dimensions and title block?+
Because they are line work too. The model cannot tell annotation from geometry, so text, tags, grids and title blocks get rendered into the image as marks on the building itself. Export a clean, geometry-only view and the problem disappears entirely.
How fast is it compared with modelling and rendering the sketch?+
Seconds against hours. A concept sketch that would take most of a day to model and render in a traditional pipeline comes back as a presentable visual in under a minute, which is why the practical change is not speed on one image but how many options you can afford to show.