AI Inpainting for Architecture: Edit One Part of a Render, Keep the Rest
4 min read
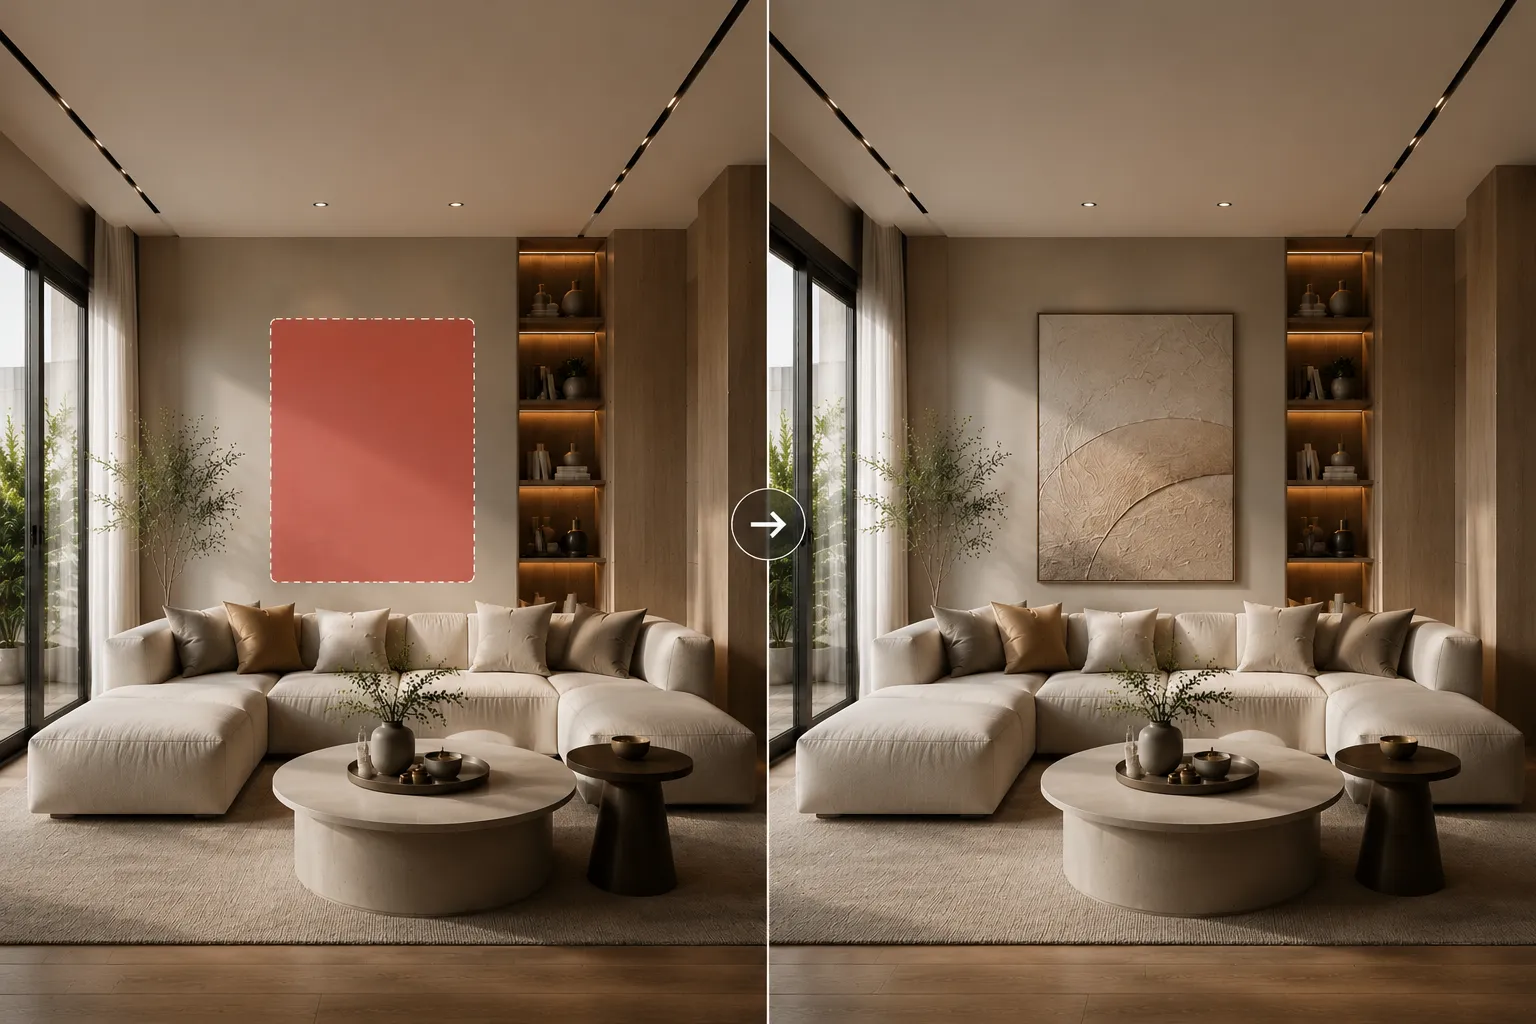
The most common client comment isn't “redo it” — it's “love it, but…”. A different floor. One more window. That chair, gone. Regenerating the whole image throws away everything they already approved. Inpainting fixes exactly this: you mask a region, describe what goes there, and the AI rebuilds only that region, matched to the scene's light and perspective.
How to inpaint a render
- Upload the image to Inpainting — an AI render, a CGI still, even a photo.
- Paint the mask over what should change. Be generous at the edges; the AI blends the boundary.
- Describe the replacement. “Wide-plank oak flooring”, “floor-to-ceiling window with black frame”, “nothing — empty wall”.
- Generate and compare. Everything outside the mask stays pixel-identical, which is exactly what an approving client needs to see.
What it's used for in practice
- Revision rounds: material and furniture changes without touching the approved composition.
- Cleanup: removing artefacts, clutter or an awkward object from an otherwise perfect frame.
- Options: the same room with three different floors — one render plus two masks.
Tips for seamless results
- Name materials and colours explicitly; “nicer floor” gives the AI nothing to hold onto.
- One change per pass beats one giant mask — chain small edits.
- Keep lighting words consistent with the scene (“warm evening light” in a daylight render will fight the image).
At 10 credits per edit it's the cheapest revision round you'll ever run. Open Inpainting, mask the thing your client mentioned, and send the fix back today.