How to Convert a 2D Image to a 3D Model with AI (Free, Online)
6 min read
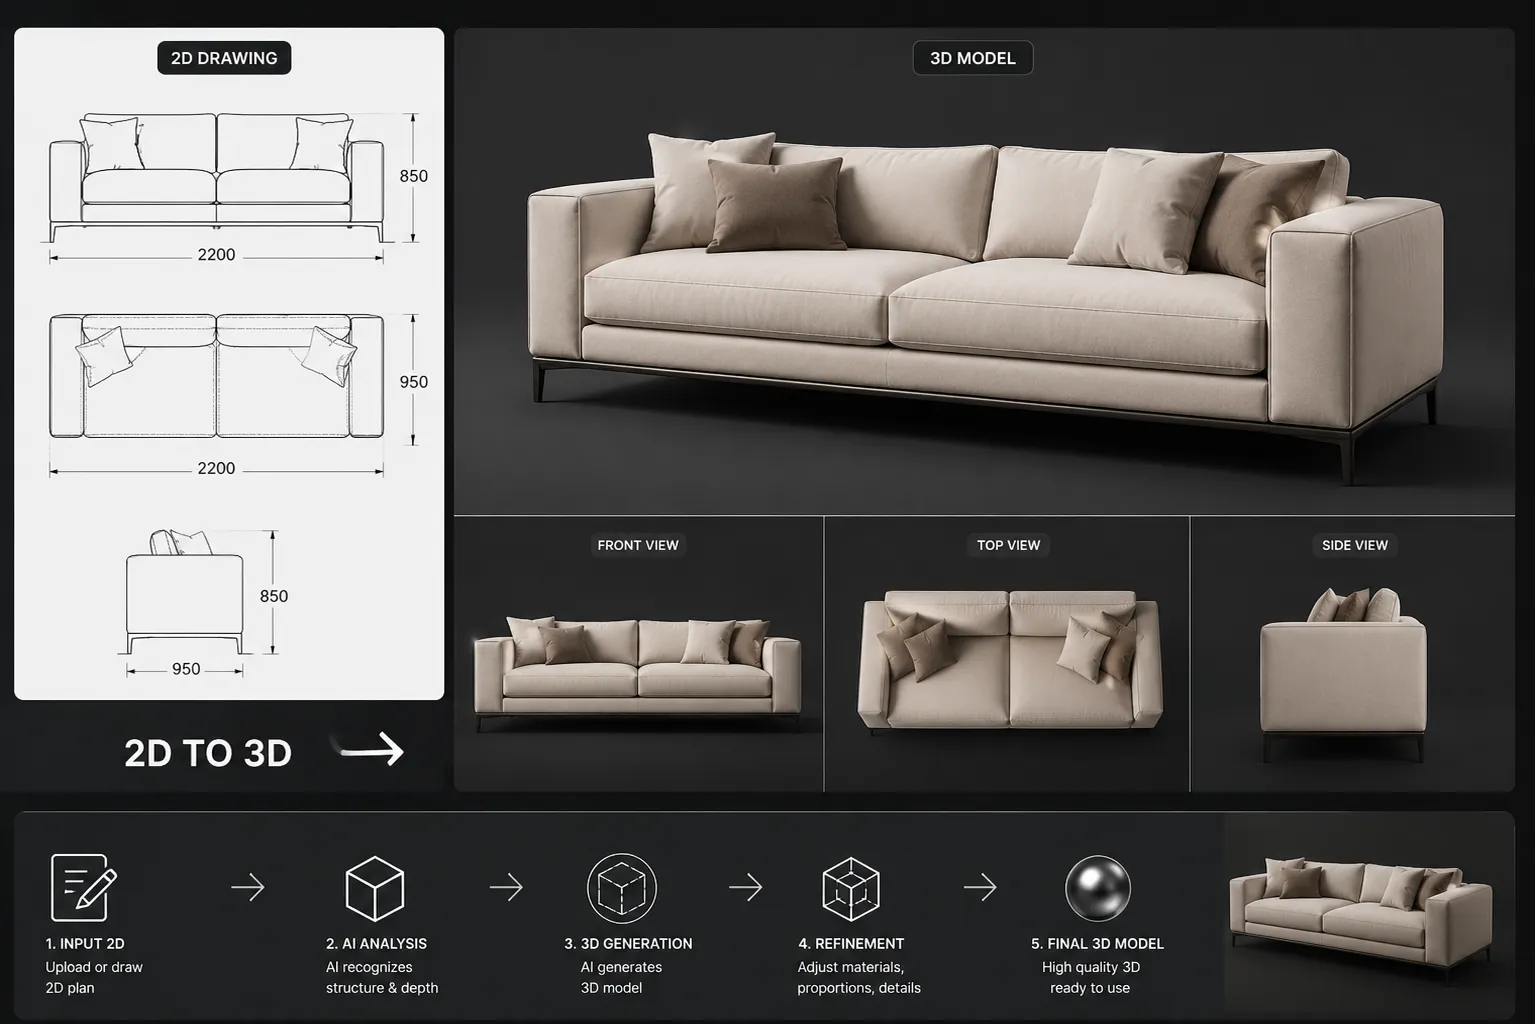
Until recently, getting a 3D model meant one of two things: modelling it by hand in Blender or SketchUp, or scanning a real object with photogrammetry — dozens of photos, special software, hours of cleanup. AI collapsed that into a single step. Upload one 2D image — a photo, a render, a product shot — and a textured 3D mesh comes back in seconds, ready to download as a GLB file and open in any standard 3D tool.
What "2D image to 3D model" actually means
The AI looks at a single flat image and infers the depth, volume and hidden sides of what it sees — the same guess a human brain makes when looking at a photo. It then builds a real polygon mesh with textures mapped onto it. The output is a GLB file, the standard 3D format that opens in Blender, SketchUp, Unreal, Godot, Three.js and every major web 3D viewer.
What kind of images work
- Furniture photos — a chair or sofa photographed against a simple background converts remarkably cleanly. Great for populating scenes with real products.
- Architectural renders — turn a finished render into a massing model you can orbit and present.
- Product shots — one catalogue image becomes a web-viewable 3D asset for a listing.
- 2D floor plans — upload the plan image and get a 3D interpretation of the layout (for a fully rendered 3D view of a plan, Plan & Render is often the better fit).
- Facades and buildings — a straight-on photo of a building face converts into a dimensional study model.
How to convert your image (30 seconds)
- Open the 2D Image to 3D Model converter — it runs in the browser, nothing to install.
- Upload one image. A clear subject on a simple background gives the cleanest mesh.
- Generate — the AI reconstructs the mesh with textures in seconds.
- Download the GLB and drop it into SketchUp, Blender, Unreal or a web viewer.
Every account gets 100 free credits a month, so you can try several conversions online at no cost — no credit card required.
Tips for a cleaner mesh
- One subject per image. Busy scenes with overlapping objects confuse the reconstruction — crop to the thing you want.
- Simple background. A plain wall or seamless backdrop helps the AI separate the object from its surroundings.
- Even lighting. Harsh shadows get baked into the texture; soft, even light reads best.
- Higher resolution in, better texture out. A sharp 2000px photo produces noticeably better surface detail than a small thumbnail.
What it's honestly good for — and not
Single-image reconstruction produces a plausible 3D form, not a measured one. For visualisation, web assets, client presentations, mood models and concept massing it's excellent — and it's a fraction of the cost and time of manual modelling. For construction-accurate geometry or manufacturing tolerances, you still model properly. Most users combine both: AI for the 90% of assets that just need to look right, manual modelling for the parts that must measure right.
From 3D model to full presentation
A converted model is rarely the end of the pipeline. Teams typically render the model into a scene with photorealistic AI rendering, or take a finished render and turn it into a cinematic walkthrough video for the client meeting. The 3D step is what makes the asset yours to reuse — one image in, a model you can light, stage and animate forever.
Try it on your own image now: convert a 2D image to a 3D model free — your first conversions are covered by the monthly free credits.